


How to upload an Android app application on Google Play store?
Jul 2015


If you are planning to develop an Android Application and want to share publicly than Google Play is the best way and the best place. There are numerous of articles to show the steps of “How to Upload an Android App Application on Google play but Hyperlink Infosystem is here with the accurate steps with the related screen shots to give you the exact idea of the whole process which is one of the parts for Android Application Development.
Let's have a journey of a process to Upload an App on Google Play Store:
Step 1:
Firstly you need a Gmail Account. With the help of your Gmail ID you will be able to open a Google Developer Account.
It is compulsory to create a developer account. Charge to get the developer's account is $25.
Step 2:
After opening a Developer's account you will see a Tab “Add New Application” near the top of the screen. Click on the same and you will get a screen below.
.png)
Using the drop down menu, you can select the default language and add a title for your App. After the same there will be two options.
Upload APK and Prepare Store Listing
Now you can Upload APK if you are planning to launch your App in near days but if you just want to reserve your app name in Google Play Store and upload the app after some more days than selecting “Prepare Store Listing” would be a good choice. And after when you decide to Upload APK you can do it later on.
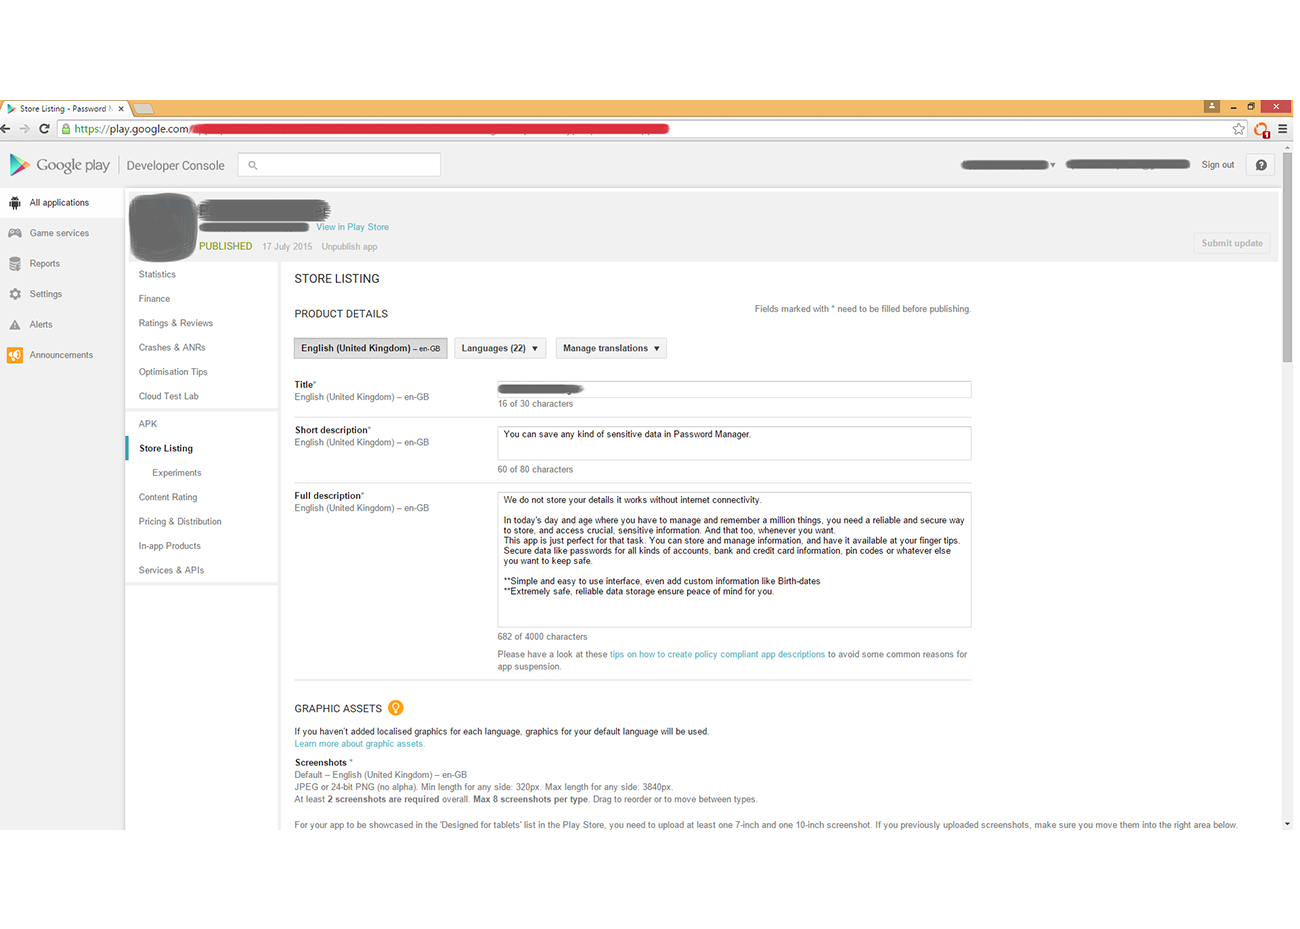
As per the screen above Now you can manage language translation from the Language list down. After the same as you can see in the screen shot above you need to fill the “*” Stared places.
-
Title: Title will appear automatically as you have already entered initially.
-
Short Description: You need write a short description of your app till 80 characters.
-
Full Description: Here you can write the whole full description of your application till 4000 Characters.
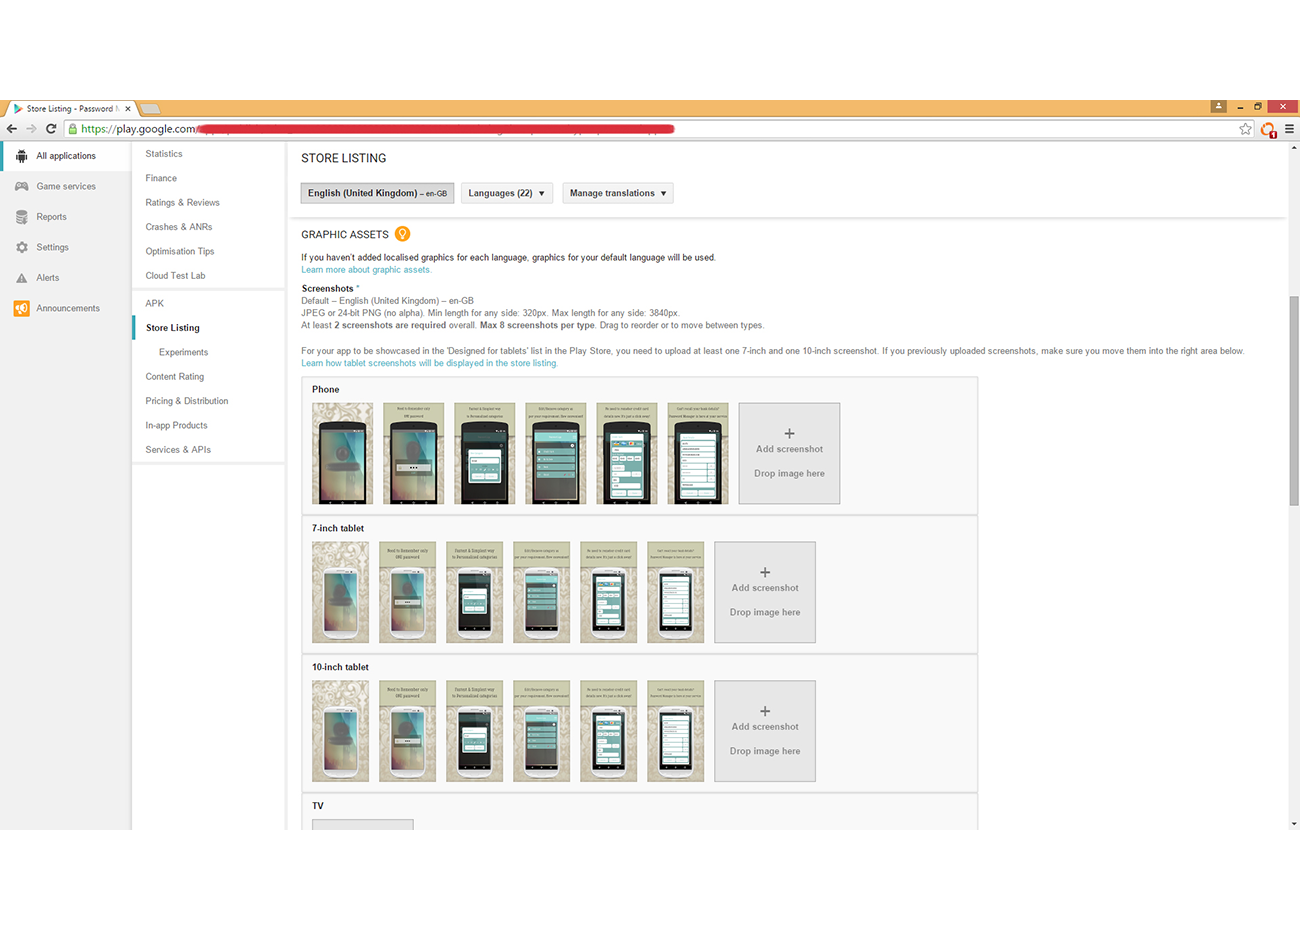
As per the screen shot above now you need to upload the screenshots of your application. If you read the instruction you will come to know that you are required to upload atleast two screen shots overall and maximum 8 screen shots per type.
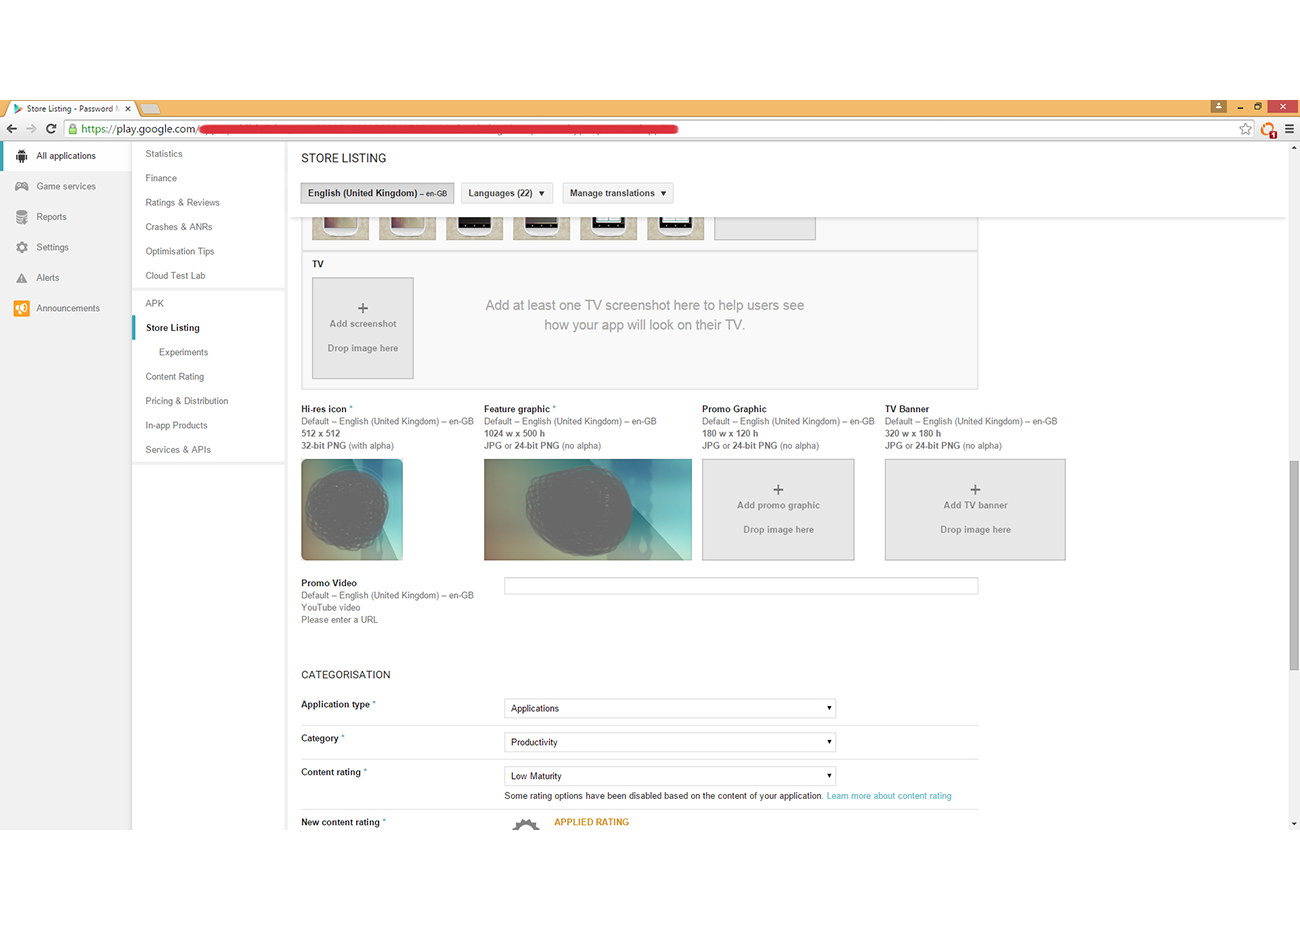
Now it comes to the icon and the image which will shown in the Google App store after uploading the application. Users will be attracted by those icons and images. As per the above screen shot you can see the “*” starred requirements by the play store. One is High resolution icon of your application and second is Feature graphic image. You need to upload both of them according to the mentioned size. Other requirements are optional but if you want to make your app appealing you should upload the other images and the link of a you tube video of your app.
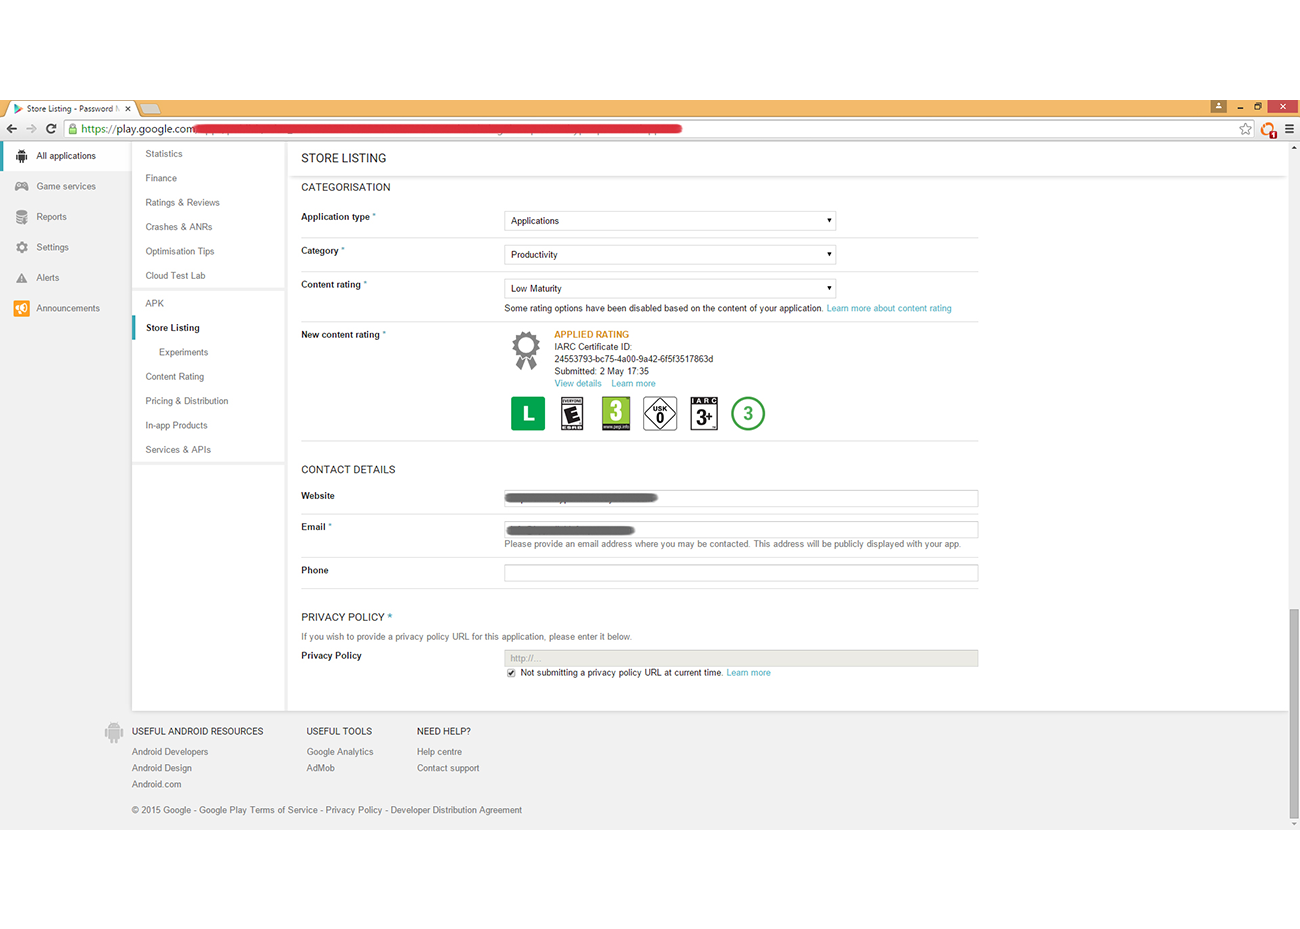
After the same, “Categorization” column should be filled. Even here your need compulsorily fill the “*” starred requirements such as Application type, Category, Content rating and New Content Rating. The New content rating will be seen only after you upload the APK of your application and it will be seen automatically.
Now its turn to fill the contact details of yours such as Website URL, Email address, Active phone number. It is advisable to fill the correct and each contact details for smooth communication with Google Play Store. You also need to give the URL for your Application related privacy policy. If you do not have such policy than you need to tick on “Not submitting a privacy policy”.
Step 3:
.png)
Now its turn to upload the APK of your Application. There are three type of this process as below.
-
Production:
This type of uploading APK can be chosen when your app doesn't have a feature called “In-App purchase”. So if you want directly upload the APK without testing than this will be a good option.
-
Beta & Alpha Testing:
When you have the feature “In- App purchase” in your application than you can first upload your APK file on Beta or Alpha testing.
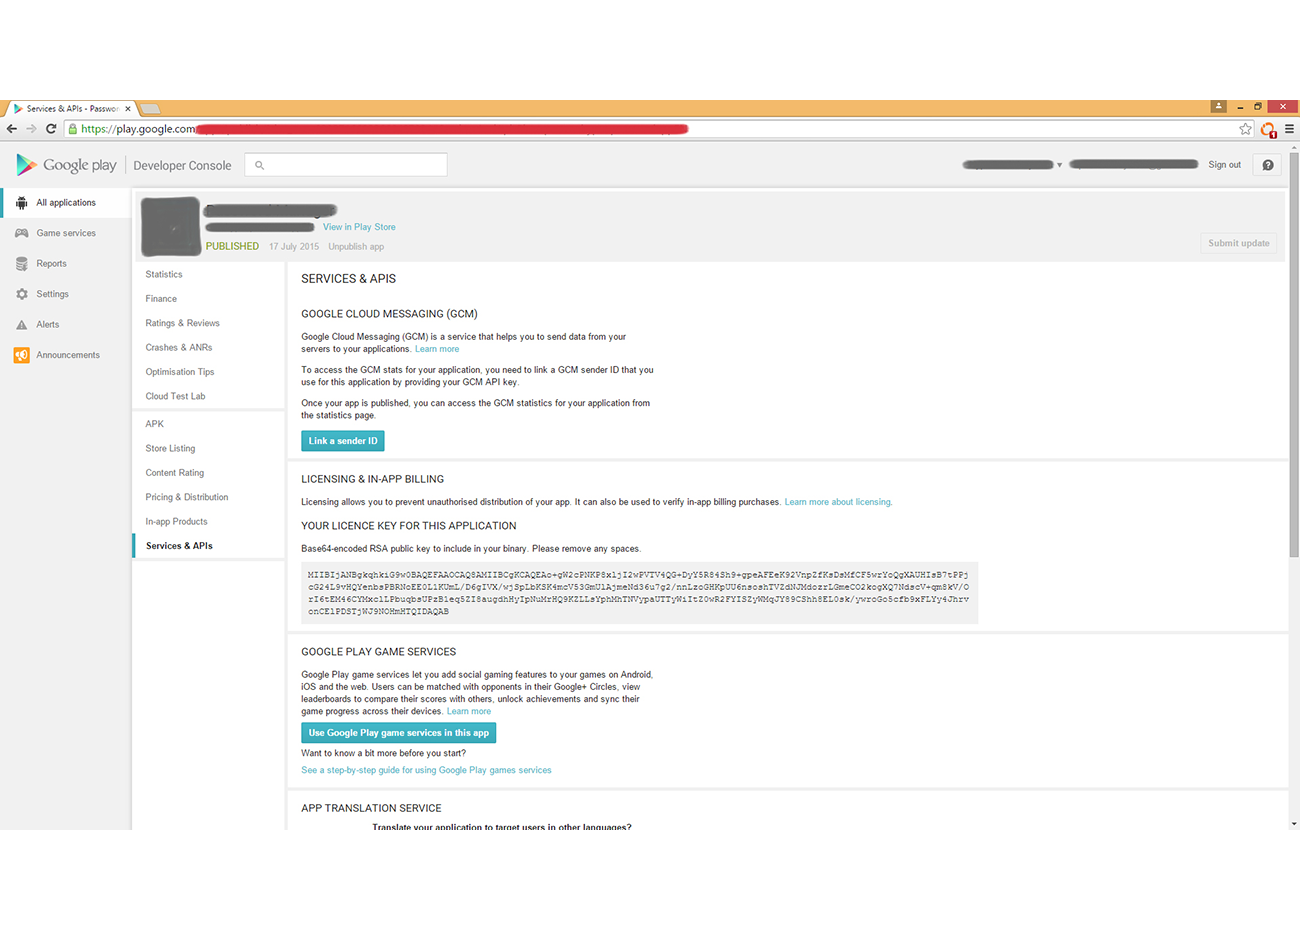
After the same you will be able to get a “Base64- encoded RSA public key” from “Service & APIs” Tab. After getting the Key you can enter the same in your Application code. This will be helpful for your “In-App” feature of your application.
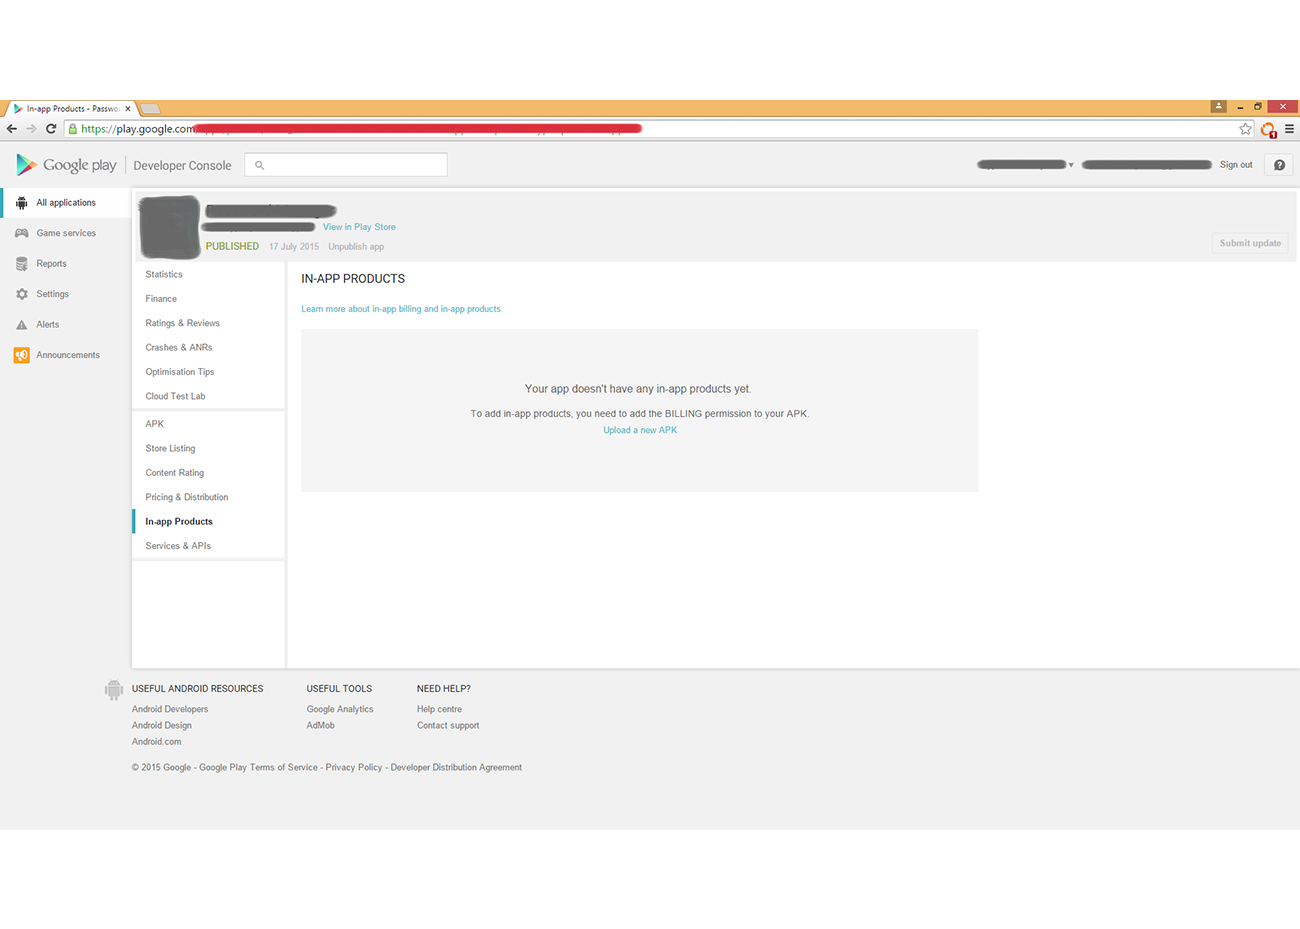
After the same to add in-app products, you must add BILLING permission to your APK. This permission can be added in .mainefest file.
.png)
You can add two types of products 1) Managed Products 2) Subscription
The difference between the two is if you choose Managed products you do not have to pay further once you pay for it initially and if you choose subscription you need pay for your product every month.
Now you need to enter your “Product ID”* which is also called as “SKU”.
So now you are eligible to add in-app products, price & description of your Products.
Step 4:
Pricing & Distribution:
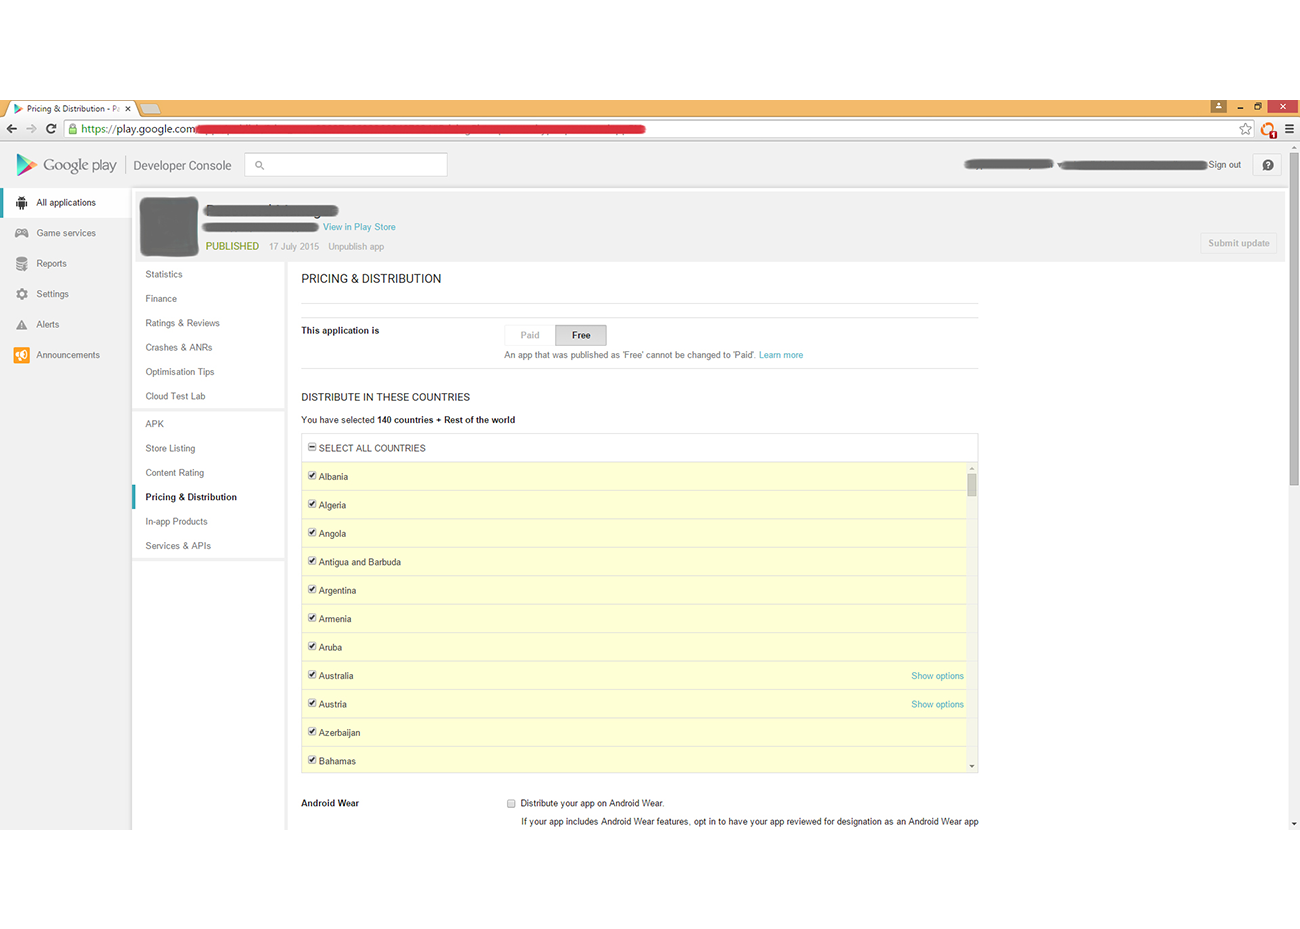
There are two types of this category. You can choose your application to be uploaded as free or paid. You can go ti the Tab “Pricing & Distribution” and click on “Free” tab. Now you can select the countries where you want to make your application free for your users.
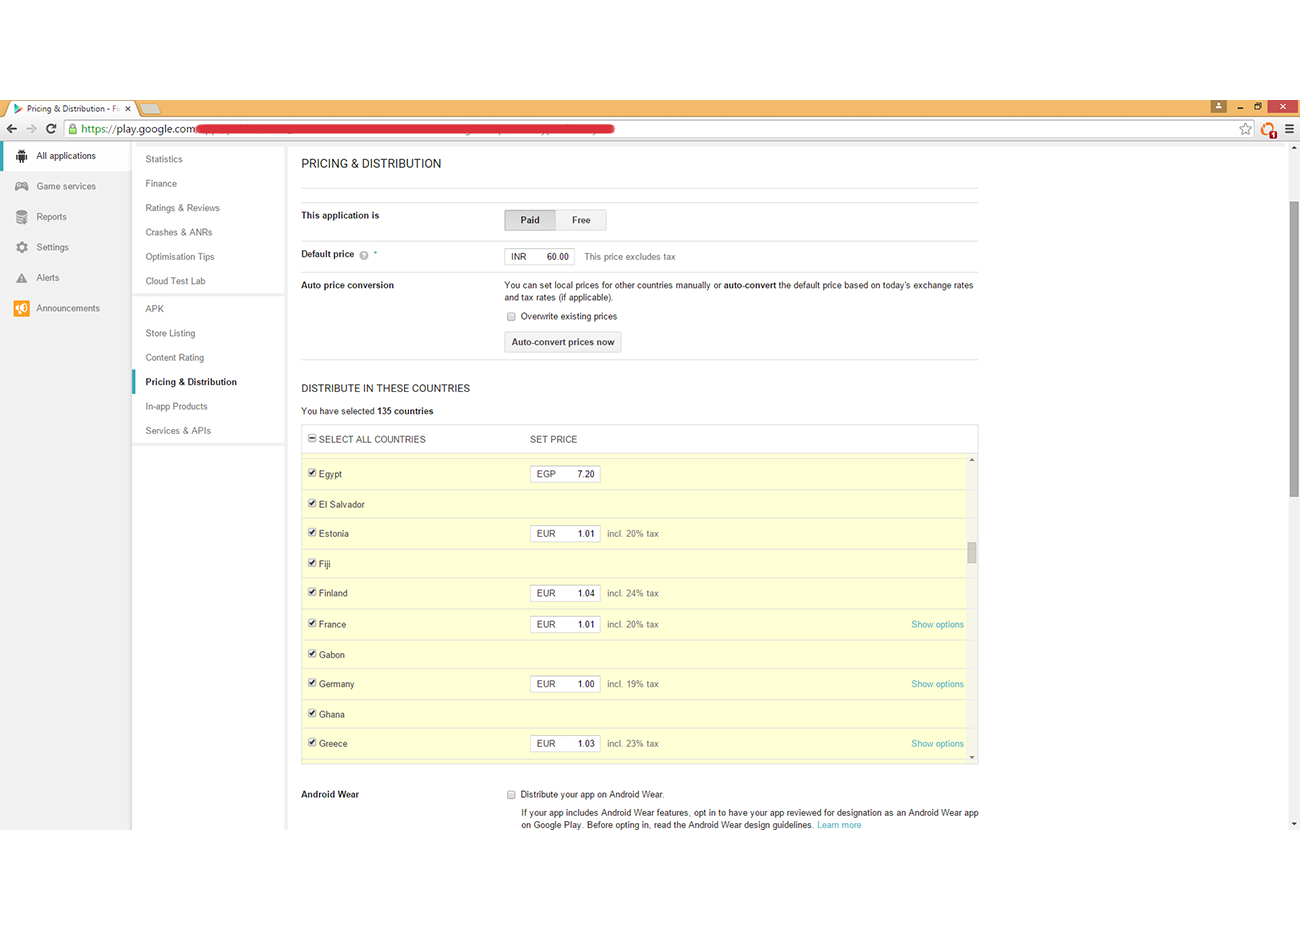
The other type is “Paid” application. You can select “Paid” tab if you want you application to be paid for your valuable customers.
Now you must add the default price of your application. For Example if your “Developer's account” is of India, the currency code will come as “INR” and so on. For India you can not keep your default price below INR 50 and for USA you can not keep the price below USD 0.99.
If you want your default price converted automatically in other country's currency that you can tick on “Overwrite existing prices” and click on “Auto convert price now” and on the other hand if you want to set price manually in each countries you skip the above mentioned process.
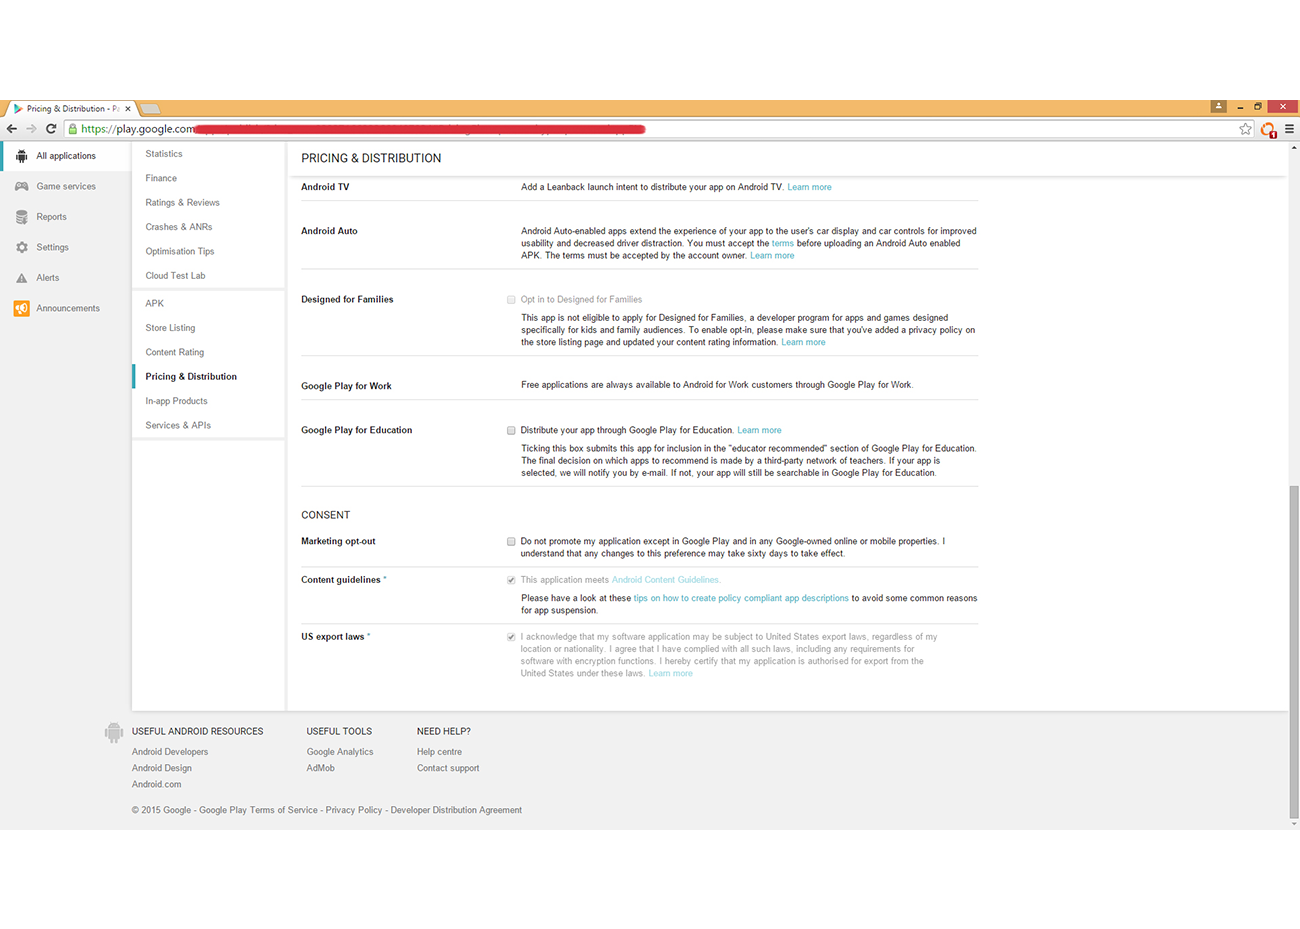
Now one important part is coming. The “CONSENT” column. If you have uploaded the APK the following options will be shown.
1) Content Guidelines 2) US export laws
You need to check mark both of them compulsorily after that options get to see.
Step:5
Now the last part to upload your app is to generate content rating automatically where you need to enter your registered email ID and need to select the category of your app. The description of each type of category is written below the same so that no confusion will be there. After choosing the correct category, you will get a questionnaire to fill. Now you are done with all the steps and processes and you will get all the green ticks in the list given on the left hand side. If you do not get all the green ticks, you have made any mistake while following the steps or fulfilling the requirements. After getting all green ticks there will be a Tab called “Publish App”. Pressing the same will give the confirmation that your Android Application has been uploaded on Google Play Store. Yay!
You can also Hire Android App Developer if you are not able to upload your application or not clear with steps. Hyperlink Infosystem does the best Android App Development India and serve you the Android Developers. Contact us for any more information. We are here at your service.

Harnil Oza is the CEO & Founder of Hyperlink InfoSystem. With a passion for technology and an immaculate drive for entrepreneurship, Harnil has propelled Hyperlink InfoSystem to become a global pioneer in the world of innovative IT solutions. His exceptional leadership has inspired a multiverse of tech enthusiasts and also enabled thriving business expansion. His vision has helped the company achieve widespread respect for its remarkable track record of delivering beautifully constructed mobile apps, websites, and other products using every emerging technology. Outside his duties at Hyperlink InfoSystem, Harnil has earned a reputation for his conceptual leadership and initiatives in the tech industry. He is driven to impart expertise and insights to the forthcoming cohort of tech innovators. Harnil continues to champion growth, quality, and client satisfaction by fostering innovation and collaboration.
Latest Blogs


Is BlockChain Technology Worth The H ...
Unfolds The Revolutionary & Versatility Of Blockchain Technology ...


IoT Technology - A Future In Making ...
Everything You Need To Know About IoT Technology ...
Feel Free to Contact Us!
We would be happy to hear from you, please fill in the form below or mail us your requirements on info@hyperlinkinfosystem.com
Hyperlink InfoSystem Bring Transformation For Global Businesses
Starting from listening to your business problems to delivering accurate solutions; we make sure to follow industry-specific standards and combine them with our technical knowledge, development expertise, and extensive research.
4500+
Apps Developed
1200+
Developers
2200+
Websites Designed
140+
Games Developed
120+
AI & IoT Solutions
2700+
Happy Clients
120+
Salesforce Solutions

40+
Data Science